Wallpapering ¡Wallpaper Installation in Miami! | Expert Service
Get professional Wallpapering ¡Wallpaper installation in Miami!. We offer expert service, high-quality materials, and competitive prices. Request a free quote today!
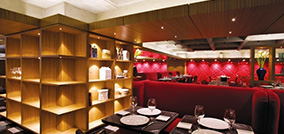
The Best ¡Wallpaper Installation Miami!, Wallpaper Installer Hanging Miami, Wallpaper Hanging Miami near me Store,Stock Available at our Miami Store!
We Have different types of beautiful Wallpaper and Wallcovering
Offering you amazing ¡Wallpaper Installation Miami! by the best Showroom for
Wallpapers, Wallcovering, Custom Drapery offering the best Intallation Service and products.
Before placing your Wallpaper it is necessary that your wall
is completely smooth and preferably made of plaster or drywall properly
sealed or painted as the case may be.
Why should the walls be prepared in this way? Simple; Because the
tapestry is a material that adheres to the surface where it is placed,
it is very likely that when it is installed on rough surfaces or with
imperfections, these are notorious on the material and may even
mistreat it. There may even be a possibility that the repeating
patterns, which make the design continuous, may not fit properly.
Our main recommendation when deciding to install wallpaper is that it
be done by a professional installer or a person with previous
experience in the placement of this type of material, since as there is
a wide range of tapestries, textures and finishes, each of them it may
require certain knowledge for its installation. In addition, you can
guarantee that if it is an external installation service, the
installers already carry the necessary glues for their placement and
you can demand a decent and quality job for your home and its needs.
In the same way, if you decided to install the material on your own and
wanted to know how to install wallpaper, we leave you these little tips:
The first thing to take into account is that the walls are prepared as
we showed you earlier in this section.
You must have on hand the necessary materials for its placement (glue,
brushes, rulers, plecas, weight or level and cutters).
Review the instructions on your wallpaper roll, as some already have a
pre-arranged glue that activates with water; Others must add the glue
directly to the back of the material (generally, most of the tapestries
are of this type) and there are other tapestries to which the glue
should not be added as it must be placed directly on wall or surface to
be placed.
Check if your wallpaper roll has a repeating pattern, as this will
generate leftover material. Remember that you should cut canvases based
on the height of your wall. From the second canvas, you must find that
the drawing or pattern matches and make the cut to the appropriate
measure.
To install a wallpaper, you will need to prepare the glue according to
the instructions of the same and place it on the material, let it rest
a little so that the glue begins to activate and place it properly on
your wall, starting from the left corner of your wall and moving
towards your right. Lean on the weight or level so that the canvases
are completely straight.
Take these tips into account or send us an email to support you to
resolve your doubts about Wallpaper
installation.
Wallpaper has always been an excellent solution
for giving exclusive colors and designs to walls, the kind that are
difficult or expensive to achieve with hand painting. But in recent
months it has regained its importance and its use has become a booming
trend when it comes to interior decoration. Why?
Because they adapt to any type of space and can completely renew the
aesthetics of a room. In addition to this, today they are of the
highest quality and serve to cover, in addition to walls, ceilings,
stairs, doors and even furniture.
If you are thinking of renovating your home or office with this paper,
do not hesitate to do so. The installation process is very simple; you
do not require technical knowledge or special tools. You just need:
< The wallpaper
< Wallpaper glue
< A foam
< A tape measure
We take the trouble to summarize the installation in a few steps, in
order to facilitate the process and the consequent renewal of the
appearance of the place where you reside or work. Take note:
Step
1. First of all, choose the wall to decorate
To
buy the wallpaper you must be clear about which walls or areas of them
you are going to upholster. This will allow you to know exactly what
quantity you need and to easily choose the color and design. So check
your house and think about where they would look best. Don't be shy
about it; As we already pointed out, this paper adapts to any type of
space and does not look bad if you install them on several walls.
Once you have chosen the wall or walls to cover with the wallpaper,
measure the width and height of each one. With this information you can
buy the number of square meters you need to carry out the installation.
Do not forget to consider a percentage of waste, it can be 5 or 10%.
Step
2. Now choose the wallpaper
When choosing,
consider your personality, the color of the other walls, the type of
decoration of the room and the furniture.
Geometric and abstract designs are on trend and generally make a
perfect match with all types of furniture. But organics are also quite
desirable; in the living room or rooms they look great as a decorative
element on the walls. For example, you can place it only where your bed
is going and complement it with a contrasting paint tone.
There are also the texture designs, which offer the space unique and
elegant finishes. Neutral colors and textures to the touch are usually
seen on bathroom walls, as they make the space cozy and sophisticated,
with a unique style. Do not forget that this is one of the most popular
spaces for residents and visitors, so there is no need to skimp on its
decoration.
But if what you are looking for is coverage for the walls of the
children's rooms, go for the designs with bright and fun colors. If you
want to be more original and the space is wide, you can just line the
ceiling and paint the walls in a tone that highlights the tapestry.
You will see how impressive the decoration ends up being.
In any case, if you plan to line more than one
wall, dare to combine different styles of patterns and / or colors. The
idea is to use similar shades, play with the proportions of the space
and use different figures at the same time. Try, for example, with
striped patterns mixed with a filigree or floral pattern.
Step
3: Prepare the environment and ask for help
Installing
the wallpaper is not difficult, but optimal results require a helping
hand, especially if the area to be lined is more than one square meter.
Ask any other member of the household or office for help.
Otherwise, it prepares the environment for work. I mean, get
comfortable. Some music to your liking and open windows so that air and
light can enter can be ideal in this regard.
Of course, do not forget to remove the furniture and decorative
elements from the space where you are going to work. The idea is to be
as comfortable as possible.
Step
4: Prepare the surface
Now
the work does begin. It removes any imperfection from the wall,
ceiling, staircase or door, understood as a paint bulge, lace holes,
cracks, etc. If necessary, heal with plaster or plastic stucco for best
results.
Then clean the surface with a soft cloth. The idea is that it is
completely dry and free of dust, impurities, grease and / or any other
type of dirt.
Step
5: Prepare the strips of wallpaper
According
to your measurements, start cutting the wallpaper with a scalpel,
adding to the height length 6 centimeters above and 6 centimeters
below, that is twelve in total.
Make sure that the cuts are completely straight and as precise as
possible.
Step
6: apply the glue
Spread
the glue out and let it sit for a few minutes, preferably those
recommended by the manufacturer. If the paper you chose is one that
already has its own sticker, you should simply skip this step. In this
case, do not remove the protector for any reason; you should do that as
you cover the wall. This prevents it from sticking to unwanted places,
wrinkling or picking up dirt.
Step
7: Select a corner to place the first strip
Measure
the width of the strip on your wall and draw a vertical line to serve
as a guide, that is, to align the paper with that stroke and not with
the same wall, as this may be collapsed or present other
inconsistencies.
Step
8: remove the bubbles and cut the excess
Start
gluing the paper from bottom to top and in small sections, to avoid
creating large folds that are difficult to remove. Then, with a damp
sponge and with the force of your hands, remove any remaining bubbles
or wrinkles.
Finally, you only have to cut the excess paper flush up and down,
looking for the highest possible precision so that the finish is of
high quality.
Step
9: Get to work!
Repeat
the procedure of the previous step with the next strip of paper, and
with the next one, until you completely cover the surface you plan to
reinvent. Ready! It is a quick process.
At the end, you just have to put the furniture and decoration back and
start enjoying your new interior design. You can invite family and
friends to get to know the new look of your house and celebrate that
you did it on your own, without having to hire the services of anyone.
Commercial
wall coverings Installation can be used in almost
any type of commercial environment. There are many different types on
the market that can make finding the right product difficult. Here are
some ways to find the right commercial wallcovering based on your
installation needs.
Key considerations
One of the first things to do when selecting a commercial wall covering
is to consider how much traffic the area experiences. Paper and natural
wallcoverings are best suited for minimal traffic locations, while
vinyl and synthetic wallcoverings are often used in sports stadiums,
schools, hospitals, and other high-traffic areas.
In many cases, residential wall coverings can be ideal for use in
commercial settings to add comfort and set a tone. For example, an
assisted living facility may have one installed for a home environment.
Commonly used commercial wallcovering
There are several popular commercial wallcovering options that are
specifically used for facilities such as apartment buildings, hotels,
retail outlets, office buildings, hospitals, and schools.
These coatings include:
Vinyl Coated Paper - A
wallcovering made from a paper substrate that has been sprayed or
coated with a decorative surface made from vinyl or acrylic-type PVC.
Solid Sheet and Paper-Backed
Vinyl - A wallcovering constructed of a paper substrate laminated to a
solid decorative surface. They are extremely durable and can be peeled
and scrubbed.
Fabric-backed vinyl - Wallcovering
that has a fabric or artificial substrate, which is laminated to a
solid vinyl accent surface
Certain wall coverings are used in specific
circumstances for low traffic areas. Many of these have been replaced
by similar looking vinyl siding with increased durability. However,
these coatings are still frequently used for decorative purposes,
including:
String Effects - Fine vertical strands
laminated to a paper substrate, often used for offices and other areas
with less traffic.
Natural Textile Wall Coverings - These
textiles are typically laminated to a backing for additional
dimensional stability and to help prevent adhesive from coming to the
surface.
Acoustic Wall Coverings - For areas
where sound needs to be absorbed and controlled, these wall coverings
are ideal and are often used in meeting rooms, theaters, auditoriums,
and restaurants, among other places.
These are some of the many commercial wallcoverings that you will find
when looking for the perfect materials for your facility.
Source: independence painting co
Article:Wallcovering install
Wallcovering Installing
There are two reasons
Installing your walls before installing wallcovering. Wallcovering
Installing ensures that your wall covering will adhere
correctly to the wall and it aide’s future removal. As Wall
Covering dries, normally over a 24 to 48 hour period, there is a
significant amount of pull as the paper contracts. If the Wall Covering
has not formed a good bond, it will pull away from the wall.
Additionally, when the paper is later removed, it may damage the
covering of the underlying surface. Proper Installing will
ensure the best results from your wallcovering.
Surface Repair
The first step is to repair any defects in the wall surface. With
drywall, any dents, nail holes, or surface imperfections should be
filled with spackling or drywall patching compound. After the proper
drying time for the particular compound you are using, the repaired
areas should be sanded to leave a smooth and level surface. With
plaster walls, any defects should be filled with a joint compound. As
the filler dries, it draws together slightly and when dry you should go
over the area again until smooth.
Larger defects have to be reinforced with joint tape. The crack should
be scraped clean and moistened with water. Fill the crack with filler
and place the joint tape (very thin fiberglass tape) over the crack in
a vertical direction. Now, go over the tape with a thin layer of filler
and carefully smooth the filler using the spatula. When the area is
dry, you can carefully smooth it with sandpaper.
Once your walls have been repaired they should be cleaned of any
sanding residue, grease or obvious stains. Stains may be spot treated
with stain killing primer as necessary. Any moldy areas must be treated
with a mold remediation solution prior to application of any stain
killing primer. Especially difficult stains may require the use of
oil-based primers. It is normally recommended to cover these treated
areas with an acrylic primer. With the exception of primers that
specifically call for sanding of any gloss finish, you are ready for
priming.
Installing for Wall Covering / Wallcovering Installing
Experienced Wall
Covering installers have used different products with
outstanding results other than those listed. These guidelines were
developed as a starting point for do-it-yourself homeowners and are
considered the best guess as to what type of product will suit your
needs. This information is based on subjective, collective information
from several wallcovering professionals and may not suit your
particular application. It is imperative that you fully understand all
safety precautions when dealing with these products and always follow
the manufacturer’s instructions completely. Follow any
instructions from the Wall Covering and adhesive manufacturer as to
what type of surface Installings are needed for effective bonding.
Any surface you wish to install Wall Covering over should be primed
with a good quality acrylic primer made specifically for Wall Covering.
Source:Wallcovering Installers
Article:Cladding install guide
Cladding Installing Guide
Installing 1)
Shiplap cladding should be fitted to preservative treated 38mm x 25mm
soft wood tanellised battens.
Installing 2)
Fix battens vertically at 600mm centres. If fitted in exposed areas, ie
high rise flats, reduce centres to 400mm.
Installing 3)
When thermal insulation is required, a 20mm air gap must be provided
thus necessitating cross battens. If cladding is fitted to stud work or
subject to extreme weather conditions, a breather membrane should be
used between cladding and the substrate.
Installing 4)
Always start the Installing at the base, creating a level situation
before fitting a starter trim.
Installing 5)
Before fitting the cladding, complete trim preparation by fitting edge
trim, corner trim and joint trim where required. All trims are secured
to a batten network with a double batten required for the joint trim.
Installing 6)
For trimming around windows, use a two-part edge trim beneath and to
the sides, and a drip trim at the window head to ensure no build up of
water.
Installing 7)
On the white shiplap cladding, cut back 5mm per edge to allow for
expansion behind the edge, corner and joint trims. For laminated
shiplap cladding, allow 8mm per edge.
Installing 8)
The shiplap cladding is secured by nailing the flat-headed 30mm
stainless steel cladding pin into the nail groove. Always secure the
first nail at the centre and work towards the outer edges.
Installing 9)
Due to Eurocell’s deep tongue and groove design, any
irregularities in levels can be made up by slightly raising each plank.
Installing 10)
The last (top) plank might not finish as a complete board and if this
is the case use packing pieces from off cuts to keep the vertical datum
line level.
Installing 11)
When shiplap cladding is nailed into position, simply snap home the
front part of the two-part edge trim for a neat finish.
Installing 12)
If butt joint trims are used instead of centre joint trims
they should be staggered per length and positioned where a vertical
batten is located. Again a 5mm gap per side should be left allowing the
butt joint trim to be located. When snapped into position, one side
should be left glued, with the other free for expansion. Please allow
an 8mm gap for laminated shiplap cladding.
Source: Euro Cell
Article:install guide
Cladding Installing Guide
Cladding has been designed for beauty and ease of Installing, it is not
intended to be used as columns, support posts, beams or as other
primary load-bearing members. Before
installing it is advised to unpack the cladding
boards for 48 hours to allow them to adapt to ambient temperature
conditions.
Always stack the boards on a flat surface. It is not recommended to
install cladding boards in very cold
temperatures. composite cladding boards are more
flexible than hardwood boards, it is important that you get your
support structure right in order to prevent problems in the future.
1
It is recommended that the battens used to support
your cladding be made from composite material, this
helps to maximise the long term performance of your cladding.
Alternatively, you can use wooden battens to support your cladding
following the same fitting process as you would for composite battens.
2
You will need to pre-drill the battens and the surface below using a
6mm drill bit, the battens are 30mm high and you will need to secure
them at least 50mm into the surface below. You will need to choose
fixings suitable for the surface you are fixing into. Screws should be
5-6mm diameter and at least 80mm long*.
* do not provide the fixings and screws for your Installing.
3
Battens should be attached to the surface at a maximum distance of
500mm apart. The battens will need to run the entire length of the area
being clad, adding in additional battens at any point where you will
need to join 2 cladding boards end to end. Remember to install your
battens at a 90 degree angle to the way that you want your
cladding boards to run. Battens should be 50mm wide x 30mm high and
should be fully supported once installed, it is important that the
surface below the battens is flat and stable.
4
Attach a starter strip to the bottom of each joist, this will give the
first cladding board something to sit on. You will need to pre-drill a
pilot hole into the composite batten and attach the starter strip using
a screw that is at least 15mm long. Ensure that each strip is level
with the next and that the first board sits level on the strips before
continuing to the next step. Place the first cladding board
on to the starter strips. Mark and then pre-drill pilot holes through
the fixing groove of the board into the composite batten below.
5
Secure the boards using a screw at least 30mm in length, ensuring that
the board is fastened securely on each joist that it touches. Secure
these fixings by hand, is important not to over-tighten the screws and
risk splitting the board.
6
Ensure that the section between the joists remains empty allowing air
to flow beneath the boards. Slot the second board onto the first and
repeat the fixing process ensuring that the second board is fitted
securely in place on each joist. Repeat this process with each board
until you reach the required height.
7
Continuing to fit the cladding boards in this manner until you have
completely covered the area you want. It is possible to fit your boards
side by side in a brickwork pattern. You may need to install more
battens if you wish to do this as each board will need to be supported
on a joist where it meets the next board.
8
Depending on your
Installing, you may want to finish off the edges using one
of the trims can provide to give you a lasting professional
look. There are a range of trims available in all colours to compliment
your cladding boards and these can be secured to your Installing by
screwing through the trim into the joist below every 300mm. Do not
screw through cladding boards. Alternatively, if it is not
possible to fix the trim to the joist without screwing through
the cladding board you can glue them in place using an
exterior grade high elastic glue.
Source: wpc-decking
Article:install cladding
How to install cladding
One of the best options to decorate, to insulate thermally and
acoustically and once to cover defects in the walls of the house, are
the walls coverings, sometimes called "Friezes". In this article we
want to teach you how to install cladding. you can choose the sense of
placement and decoration; for example vertical mounting, mid-height
mounting, horizontal mounting, or even 45 °.
The first thing to take into account is in which room where we are
going to carry
out the install does not have humidity, that its walls are
level and that there are no heat sources above 50 ° C.
The frieze packages have to be conditioned to the environment where they will be installed,
for this they must be at least 24 hours in the room where
the install will be carried out.
The tools and elements necessary for assembly are:
Jigsaw or Manual, walls drill, hammers
for the starting nails, Meter, Level, Pencil, Square, stapler (electric
or manual) or nailer depending on the fixing system to be used.
Strips (wooden or fiber slats or squares
that serve to fix the frieze), points or staples or clips (depending on
the system you prefer to use to fix the frieze to the batten).
1- How to install
cladding: Laying of battens
We place the battens on the walls and with the drill in hand we drill
the hole in the batten and then into the walls. We recommend fixing
with a screw that incorporates the plug and in this way we can fix the
batten or batten to the walls with a hammer blow. A separation of at
least 1 cm must be left between continuous strips to ensure interior
ventilation when the walls
covering is install to avoid differences in humidity and
condensation that would damage our frieze. The upper or lower batten
must never touch the ceiling or the floor respectively, an expansion
joint of about 3 cm must be left in both cases. Between batten and
batten we recommend a maximum separation of 40 cm and if the mounting
is on the ceiling, that separation does not exceed 30 cm.
2- How to install
cladding: Placement of the first frieze slat
The first piece or strip of frieze to be placed is very important, as
it will determine the rest of the install. It must be placed and
started from a corner leaving an expansion joint of approximately 1 cm
and the female always towards where we are going to continue the
install, that is to say, with a female face and never against the
walls. It is also important to take the level and leave it completely
straight when nailing it on the batten. We recommend nailing this first
piece, starting with a single nail, level it, and continue with the
rest of the nails. Do not worry about doing it on the piece, but yes,
in the most extreme part so that later we can hide these nails with the
corner complement moldings.
3- How to install
cladding: Rest of the install
Once this first piece is placed, the process is very fast, you just
have to fit the rest of the pieces. The male inside the previous female
and fixing the female with nails, staples or clips (we recommend clips
because they do not damage the piece and it is possible to disassemble
and reassemble).
Once we reach the end of the walls, we must measure the remaining part
and cut this last piece taking into account an expansion joint also of
approximately 1 cm.
If we have to cover surfaces of more than 10 meters in width with
vertical install of the
cladding or in height with vertical install, an expansion
joint must be left. On ceilings this distance is reduced to 8.4 meters.
We can now enjoy our most exclusive, relaxed or dynamic atmosphere,
warm, etc. depending on whether we have chosen our frieze design. In
addition, its maintenance and cleaning is quick and simple, just a
cloth slightly dampened in water.
Source:faus international
Article:Hang Wallcovering
Hanging Wallcovering
Step 1: Prepare your wall
Fill and sand any cracks or
imperfections on your wall.
Clean the wall with
detergent or sugar soap.
On fresh plaster,
“size” the wall - this means make up a diluted
solution of paste and liberally apply to the walls being decorated and
let it dry.
This will be absorbed into
the porous plaster and will stop the paste being absorbed when it is
applied.
Step 2: Measure and plan
where to start
Consider the light in the
room. If you are Wallcovering the whole room start with strong natural
light and move away from there, if creating a feature wall this is less
relevant.
The first
“drop” of wallcovering is key as all others will
align to it, so it is important to ensure it is
“plumb” otherwise your wallcovering could look
wonky.
From the left-hand corner of
the wall you are about to decorate measure 50cm and make a pencil mark
to give you your starting point.
Using this mark, draw a
plumb line using either a plumb-bob or spirit level. A plumb line is a
vertical straight line, from which you will hang the first
“drop” of wallmural against and ensure it is hangs
straight down.
Step 3: Apply the
Wallcovering paste
Apply the paste liberally to
the wall, ideally with a roller (it's quicker). You can paste over the
plumb line and make sure you apply paste a couple of centimeters wider
than the Wallcovering you are about to hang. This means you can hang
the second “drop” of Wallcovering without worrying
about applying paste over the first “drop”.
Use a 2 ”paint
brush to add paste at the top of the wall, around sockets, or just
above the skirting. This will ensure even coverage in difficult areas
and avoid the Wallcovering “lifting” when dry.
Step 4: Apply the
Wallcovering to the wall
The Wallcovering can be hung
dry from the roll. Use ladders to get to the ceiling or coving, and
allow a little extra product, e.g. 2-3cm at the top.
As you hang from the roll
lightly brush into place as you go down to the skirting board. Here you
can lightly push the paper to the wall. Leave the roll on the floor.
Ensure that the paper is in
the correct position and is vertically correct. Brush down the paper
with the smoothing brush from the center to the edges of the roll.
Cut the excess paper at the
top and bottom with a knife or Wallcovering scissors.
Congratulations, You’ve just hung your first piece of
Wallcovering!
Next ...
Working to the right of this first “drop”, paste
the wall again allowing a few centimeters wider than the width of the
Wallcovering.
You should see you don't need to get close to the first drop of paper
when doing this.
For the second drop - look to see where the paper matches (the point at
which the design fits together along the edges of the Wallcovering).
Starting at the top match the paper as you hang it dry from the roll -
lightly brushing the paper to the wall as you go. The paper will slide
into place on the paste.
When you get to the bottom of the wall - check the pattern matches, and
there are no gaps. If there are bubbles, or mismatches, just loosely
pull the paper back and brush it back down. The paper is forgiving! If
it matches your nearly there.
Finally!
Trim as before and you're done!
Repeat until you're done. Don’t worry about taking breaks or
giving up for the night. You can pick up wherever you left off - just
make sure to reapply the paste.
For most of our non-woven wall coverings they will be paste the wall
and this Hanging process works. For more complicated Hangings we always
suggest discussing it with us first or we can Hanging for you.
How to Custom
Wallcovering and Wall Murals
Understanding what you are dealing with in the beginning is vital for a
successful
Hanging.
While our standard Wallcoverings are
easy to hang, Custom Wallcoverings and Murals can be a bit
more tricky.
Luckily for you we are here right by your side to guide you.
There are videos which explain how to
Hanging Custom Wallcovering which is overlap and cut
through while some of our Murals are butt joint.
You need to make sure you know which type you are working with as the
Hanging method does differ.
But don't worry, watch the videos first and remember we are available
to assist.
1st type - Custom
Wallcovering Hanging with overlap and cut through.
If we are printing your artwork or you have chosen a design that will
be printed at our inhouse printing facility, this is the methodology
you will follow.
Experienced
Wallcovering hangers will be familiar with this method as
the same Hanging process
is followed with contractual vinyl grade wall coverings.
2nd type - Wall
Murals Hanging with butt joint.
Hanging a wall mural.
If you are ordering one of our international wallmurals, then most
likely this is the process to follow.
We have a step by step instructions below but watch the video first to
familiarize yourself with the steps.
When your wall is fully prepared, use a plumb line or spirit level to
ensure you have a straight line to begin hanging your mural.
The position of the first strip determines the overall look of the
completed mural so take time to place it accurately.
When ready to start hanging your paper be prepared to continue until
all strips are hung, avoiding long periods between hanging each strip.
Work from left to right.
First trim off the
hanging instructions, keeping nearby for reference.
Using the printed guidelines cut off the first strip of your mural.
Apply ‘paste the wall’ Wallcovering adhesive to the
wall, covering enough area for the first strip.
Apply the first strip to the wall, lining up to your plumb line /
straight edge. Use a soft cloth to gently work out any large air
pockets downwards and outwards. Take care not to overwork each strip as
this could result in stretching, making it harder to line up following
strips.
Carefully remove any excess paste from the front of the mural using a
lightly dampened cloth. Too much rubbing or cleaning may remove ink
from the paper.
Repeat steps 4 to 7 for the remaining strips of your wall mural, lining
up the design and tightly butting up each join so that no gaps can be
seen
Source: wallcoverings co za
Article:Installing Window Treatments
Top Tips for Installing Window Treatments
How to Install Window Treatments
When we moved out of the city and into our new home, we increased our
window inventory more than three-fold.
The windows we have are big and beautiful, but complicating matters is
the fact they are custom sizes.
The thought of having a professional come to measure, order, and
install window treatments
made our wallets run for cover.
Don’t get me wrong. Measuring and installation
services are
very importants, especially if you have a lot of windows.
This is a job in which you must prepare properly and pay attention to
detail.
There are a wide selection of vendors who will make window treatments
to order for you.
You can measure yourself (with their online or over-the-phone guidance)
and order through their catalogs or websites.
Once your window treatments arrive, here are some top tips for getting
those beautiful new shades or drapes up and looking gorgeous:
1. Have Your Tools and Hardware Ready
You will most likely need most or all of the following: a drill,
screwdriver, anchors, level, measuring tape, and a ladder or step
stool.
(Optional is a friend for extra hands and moral support.) Have
everything at your side, so you won’t get distracted in the
middle of the installation process.
It’s not rocket science,
but it’s best to keep your concentration.
2. Read the Instructions
Open your box of window treatments carefully (do not use a razor blade
or utility knife to avoid damaging them) and lay everything out to make
sure you have all the pieces you need.
It’s so exciting, you’ll want to dive right in, but
resist the temptation and first things first, read through all of the
installation instructions. They are generally not very long, and
sometimes the order in which you do things makes a big difference.
3. Measure Twice, Drill Once
Employ your measuring tape and level here. And definitely use a ladder
or step stool for assistance.
There is no need to strain—you want to see everything
clearly. Make sure your shade or treatment is centered with the window
or window frame.
Most brackets and hardware from online vendors come with pre-drilled
holes. Use those when measuring, and before drilling, mark the holes
with a pencil.
4. Use Proper Anchors
If you are not drilling into a stud, then get the appropriate type of
anchor for your wall type, rated for the weight of your window
treatments.
You may be tugging and pulling on these treatments several times a day,
so you want to make sure the fasteners can handle the stress.
5. Don’t Be Afraid to Ask for Help
The customer service staff at the vendor can help you if you have
questions.
They have talked people through all of this before. Do not hesitate to
reach out for their expertise!
If you have the time and fortitude to spare on a weekend to install
window treatments yourself, you can save a boatload of money. And
you’ll have the grand satisfaction and rewarding confidence
that comes from knowing you are a totally capable DIYer. Once
you’ve mastered hanging window treatments, you can move on to
hanging cabinets! The sky’s the limit.